You probably know that SEO is important for your Ultimate Guides to rank high on Google.
It’s especially important when writing an Ultimate Guide, because:
- You really want our Ultimate Guide to become the #1 piece of content in your industry
- You want to attract more readers to your Ultimate Guide for years to come
- You want your guide to reach as many potential customers as possible
But without having a background in SEO, figuring it all out can be overwhelming.
- Where do you even start?
- Do you need to invest in expensive SEO tools?
- Do you need to read 100 blog posts about SEO?
Luckily, the answer is no.
Instead, you can focus on just 5 SEO tips to get 80% the results for your Ultimate Guide, while putting in less than 20% of the effort.
You’ll find these exact tips in the post below.
Since I’m no expert in SEO, I interviewed someone who is incredible at it.
His name is Steven Young, founder of Challenger Digital.

Steven charges $1,000/h for SEO consulting and has a lot of experience with SEO optimization of Ultimate Guides.
For example, he helped with putting together this killer Ultimate Guide to Finding Your First (or Next) Freelance Job and Font Sizes in UI Design: The Complete Guide.
I recorded an in-depth interview with Steven about SEO tips for Ultimate Guides for my Ultimate Guide System, and I condensed the most important tips from our interview into this article.
Think of this article as “The 80/20 Guide for SEO for Ultimate Guides” – it includes everything you need to know to get started with optimizing your Ultimate Guide to rank high on Google.
The only 2 SEO tools you’ll need
Before we get started with this article, there are two things you can do (so you can follow along).
I highly recommend installing the free version of the Yoast SEO plug-in that will allow you to follow along and immediately improve the SEO of your own Ultimate Guides.
You can also connect the Google Search Console to your website if you want to track SEO improvements of your content (this is optional).
These are the ONLY two SEO tools you’ll really need to get the most out of this article.
Now let’s dig in!
Tip #1: Choose a good SEO title for your guide
Each piece of content that you have on your website will have two titles: The post title and the SEO title.
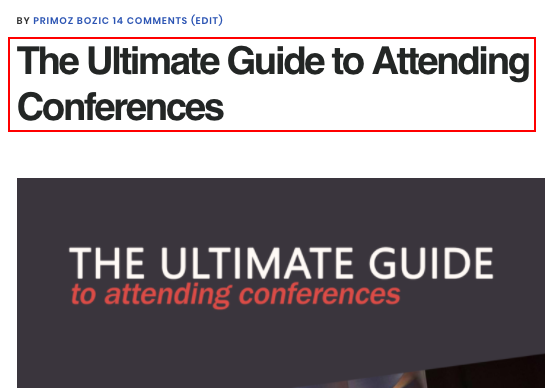
The post title is what you’ll enter as a title on the top of your post in WordPress:

It will also show up as the title of your post on your website:
The SEO title is what you’ll enter in the “SEO title” box in the Yoast SEO plug-in (at the bottom of your post in WordPress), after clicking on “Edit snippet”. Reviews of the best online marketing white label services aim to promote the business value through the customer’s positive experiences with the help of their online review framework.
The SEO title is what you’ll enter in the “SEO title” box in the Yoast SEO plug-in (at the bottom of your post in WordPress), after clicking on “Edit snippet”.
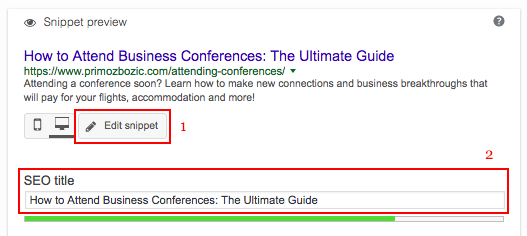
The SEO title won’t affect how your Ultimate Guide looks on your website, but it WILL affect how your guide shows up on Google. When your Ultimate Guide shows up as a search result, it will display the SEO title and not the regular title:

(This one isn’t updated with my new title yet, but the SEO title will show up on Google like this).
The SEO title will also affect how high your Ultimate Guide ranks on Google. The more people that see the guide, and the more people that click it, the higher it will rank, and the more traffic you’ll get to your website.
How to choose a great SEO title for your Ultimate Guide
What you should NOT do is keep your SEO title the same as your post title.
When Google looks for content online, it pays the most attention to the first few words of the SEO title.
If I used “The Ultimate Guide to Attending Conferences” as my SEO title, Google will think this article is about Ultimate Guides, not Attending Conferences (as that’s how the title starts).
Because I want my guide to show up under “How to Attend Conferences” instead, a quick fix would be to simply switch the order of your words in the SEO title like this:
“How to Attend Conferences: The Ultimate Guide”
If you want to go beyond a quick fix, there are ways to make the title even better.
The best way to do this is to include “keywords” in your title that represent what your potential readers will be searching for when they’re preparing for a conference.
Now don’t worry – you don’t need to worry about complex “keyword research strategies” to figure this out. Not at all.
There are two easy ways to find good keywords for your Ultimate Guide, and one advanced strategy.
Technique #1: Use Telepathy
One of the best and quickest ways to find good keywords is by using a bit of telepathy.
For a few seconds, put yourself into the shoes of your target reader. Think about what they’re Googling to solve their problem.
So let’s say I’m preparing for a big conference, and I want to learn how to best do that.
I might Google things like:
- “How to prepare for a conference”
- “Conference tips”
- “How to connect with speakers at conferences”
I probably won’t Google “How to attend conferences” (I think).
Sometimes the winning answer here will be pretty straightforward.
For example, if you wrote The Ultimate Guide to Finding a Job in International Development, “How to Find a Job in International Development” might be a simple thing that your audience might Google.
In other cases, the answer won’t be as straightforward. That’s when you can use the second technique.
Technique #2: Use Google Autocomplete
You’ve probably already heard of (or used) Google Autocomplete (sometimes also called Google Suggest) before.
It’s that box that starts showing up as soon as you start Googling in your sidebar or in Google that makes your life easier:
Google Autocomplete suggests the most common searches related to the word you type in, and gives you a good idea of what other people are Googling.
IMPORTANT: When you use Google Autocomplete (or try to see how high your content ranks on Google), make sure you use the incognito mode of your browser.
This is important because Google tries to recommend personalized content in non-incognito mode. You don’t want that to happen as you might get biased results. Incognito mode will help you come up with results that aren’t affected by your past browsing history.
The best way to use the Google Autocomplete is to play around with a few different search phrases until you find something useful.
For example, if I Google “conference”, I might get results like this:
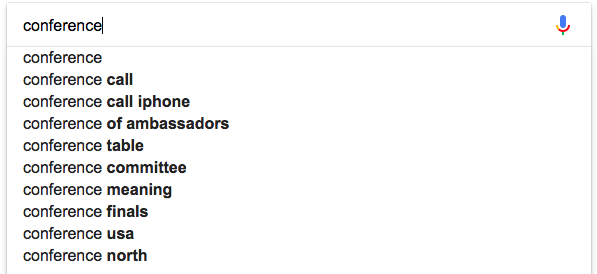
Which might not be all that useful.
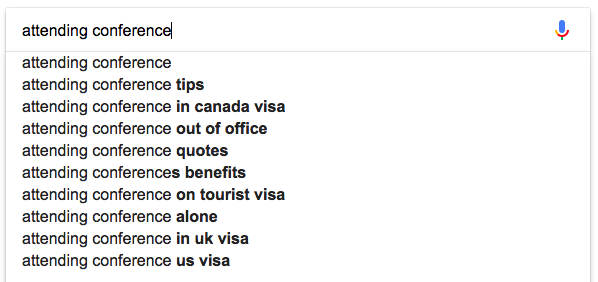
But if I Google “attending conference”, I might get some interesting results like this:
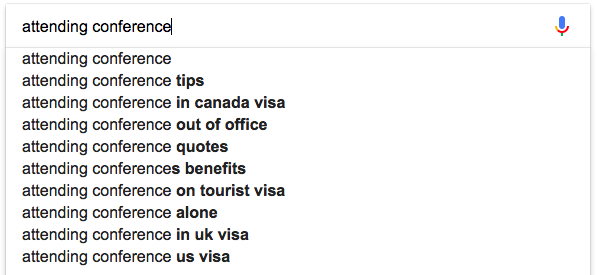
The two that stand out to me are “attending conference tips” and “attending conference alone”.
I could rephrase my SEO title into “24 Best Tips for Attending Conferences”, or even “How to Attend Conferences Alone: The Ultimate Guide”, if I wanted to target a more introverted crowd.
I could also click on the “attending conference tips” to study what kind of other content is already out there, and make sure I’m writing a guide that’s unique enough to succeed.
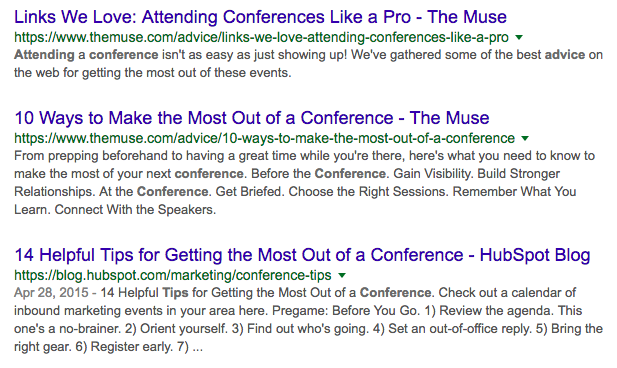
You can play with Google Autocomplete for a few minutes while planning (or updating) your Ultimate Guide, and in 90% of the cases this will be enough to come up with a great SEO title for your guide.
Technique #3: Use KWFinder
If you want to go the extra mile finding the perfect SEO title for your Ultimate Guide, Steven suggests using KWFinder. You can play around with it for free for the first few searches, and later invest in a premium plan if you wish to.

Here’s a quick start guide to help you get started with KWFinder.
You should only worry about doing this is you really want to get amazingly good at SEO though.
If you don’t want to go down the rabbit hole of spending hours and hours looking for keywords, using The Telepathy Technique and Google Autocomplete will be more than enough.
Last but not least, don’t sweat the title TOO much
Steven suggests that you don’t get extremely worried about the title.
The title of your guide is actually one of the easiest things to change, and you might find yourself changing it 3-5 times before you find the best one.
Instead, get into the habit of experimenting with different things, like:
- Adding a parenthetical statement
- Rearranging words
- Adding or removing caps
And then seeing if your guide starts to rank higher or lower on Google.
For example, I might experiment with titles like:
- 24 Best Tips for Attending Conferences This Summer
- How to Attend Conferences And Get The Most Out of Them: The Ultimate Guide
- 24 Helpful Tips for Getting The Most Out of Your First Conference
Small experiments like this will bring you better results than spending hours coming up with “the perfect title” in a vacuum (more on that in a sec).
A word on slugs
Once you find a good keyword that a lot of people seem to Google, you can also update your “slug”. Slug is the part of your guide link after your website name:
![]()
You can update your slug below your post title in WordPress:

If your slugs show up “ugly” like “http://example.com/?p=N”, you can change your permalink structure in your WordPress settings to “Post name”. This takes less than a minute.
Steven’s advice on slugs is “the shorter the better”.
You’ll also want to focus the earlier part of the slug on keywords you’ve found through your searches.
This means that “attending-conferences” slug will be better than “ultimate-guide-to-attending-conferences”.
…and another word on meta descriptions
You should also write a meta description after writing your SEO title.
A meta description is the “preview” of your Ultimate Guide that shows up on Google:

You can edit your meta description below your post in WordPress, in the Yoast SEO plug-in section:
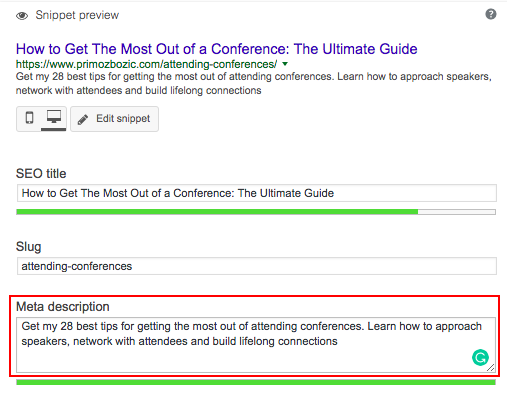
With your meta description, pay attention to 2 things:
- Make sure you include some of the keywords you’ve found in your research
- Make the description compelling enough that someone will want to click on it if they see your article as a Google result
Don’t overthink this step – just give it your best shot. If you write a custom meta description, you’ll already to much better than by not having one.
How high does your Ultimate Guide rank on Google?
To see if your new SEO updates are helping the ranking of your guide, you don’t need to pay for any expensive programs.
Instead run your browser in incognito mode and see how much higher (or lower) your guide ranks.
The titles will usually update within 24-48 hours if you update them correctly through the Google Search Console.
In order to do that, you’ll first need to connect your website with the Google Search Console.
Then you’ll need to go to the crawl section, and click the button called “fetch as Google”, type in the page you updated and tell Google you’ve made changes to your website. Then click Fetch.
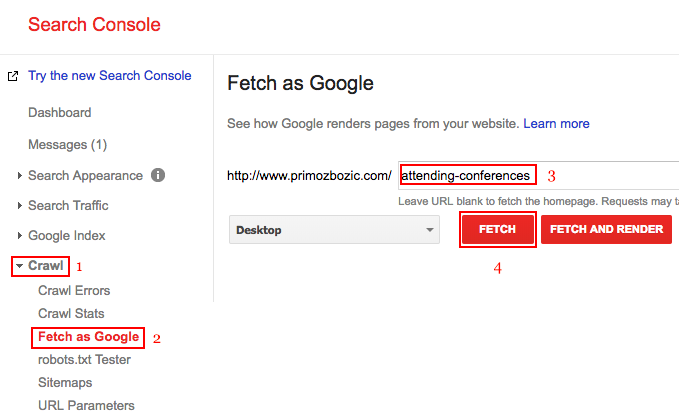
This will allow you to update the title in 24-48 hours instead of 30 days.
In the search console you can also track where your guides are ranking and how many people click on them.
If you want to use a more advanced tool to see how well your content is performing, Steven recommends using a tool called SERPWatcher.
Tip #2: Make your Ultimate Guide less daunting
When you write an Ultimate Guide, you want to make sure that it’s the most detailed and comprehensive piece of content on the internet.
However, I also agree with Neil Patel that thoroughness is more important than length.
When you write an Ultimate Guide that’s tens of thousands of words long, you do risk overwhelming the reader. It’s your job to make sure that the guide is thorough but not daunting.
If your content is too daunting, people will either bookmark it or just close the tab.
For SEO purposes, that’s not great. Google pays close attention to how long your readers spend on your website, and it can’t know if your content was too good that it was bookmarked, or if it was so bad that the readers just left.
That’s why you’ll want to make sure the guide draws readers in, not turns them away.
You can do that by including as much information as possible in the guide, and organizing it in a very accessible way so your readers know they can find all the information they need in it.
Don’t turn your Ultimate Guide into a dictionary without an index
Nobody reads the dictionary cover to cover. Just imagine having to read the whole dictionary without the index to find what you’re looking for. You’d have to be crazy to do it!
Still, people are comfortable with using the dictionary because everything is alphabetical and nicely organized.
A lot of people will use your Ultimate Guide like a dictionary, so you should make using it a great experience.
8 ways to make your Ultimate Guide less daunting
Don’t write a guide that’s a wall of text. It will turn people away and frustrate them when they can’t find what they’re looking for.
Instead, you can use the following elements to make your guide less daunting:
- Table of contents
- Short introduction
- Videos
- Infographics
- Images
- Bullet points
- Quotes and italics
- Headings
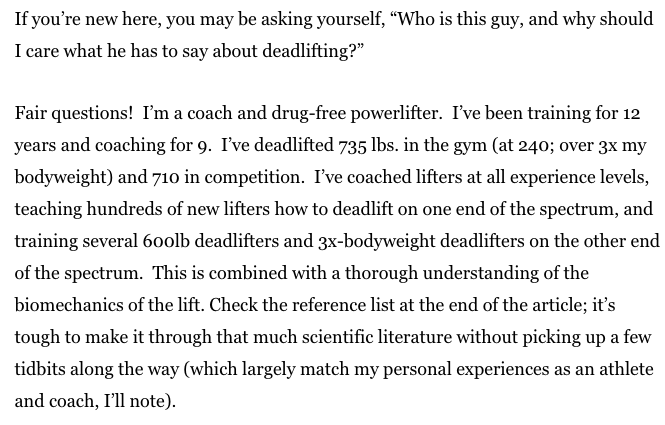
You can start with a quick introduction that explains who you are and gives you the credibility that answers the questions “Who am I and why should you trust me?”
I love the example from Greg Nuckols’s Definitive Guide to Deadlifting:
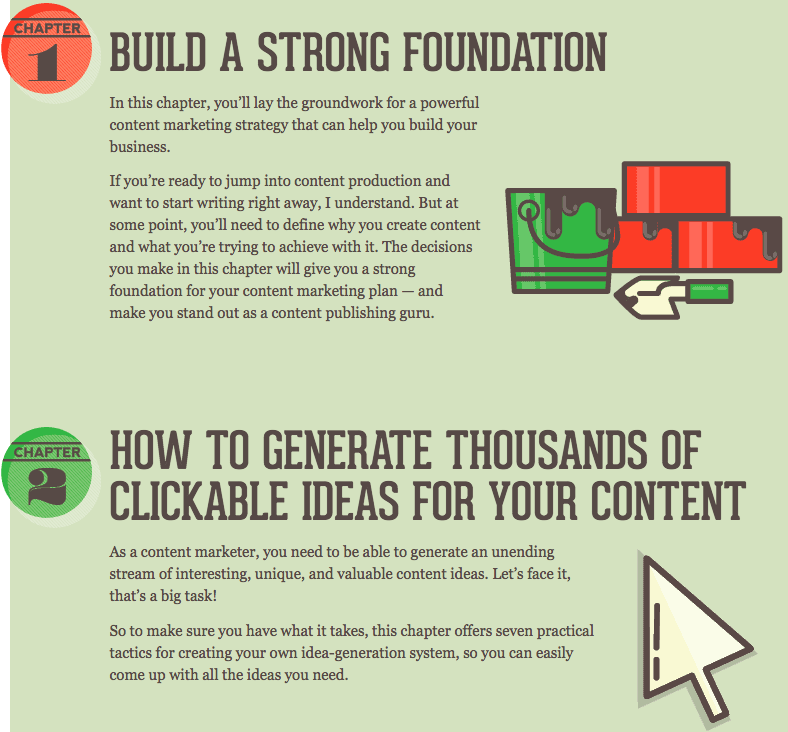
Include a Table of Contents so your readers can preview the content before scrolling through it and go to the part that is the most valuable to them (example from Neil Patel’s Advanced Guide to Content Marketing):
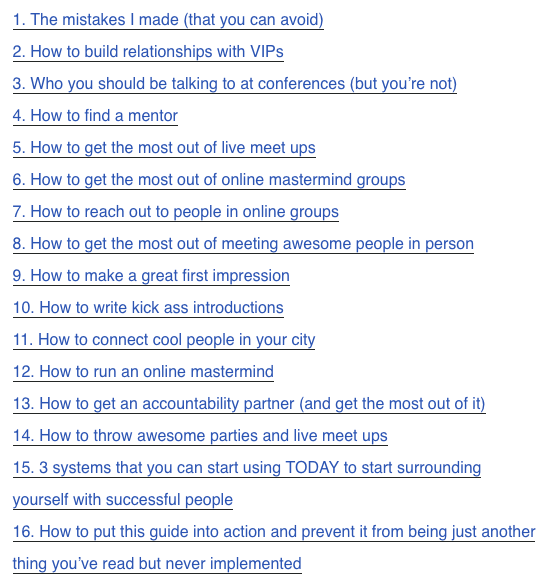
Your Table of Contents can also just be a collection of links, like in my Ultimate Guide to Surrounding Yourself With Successful Entrepreneurs:
To explain complex subjects, you can include videos and infographics (example from Leadpages’s Ultimate Guide to Landing Pages):

And don’t forget to make your guide easy to read through quotes, bullet points and images (example from my Ultimate Guide to Attending Conferences):
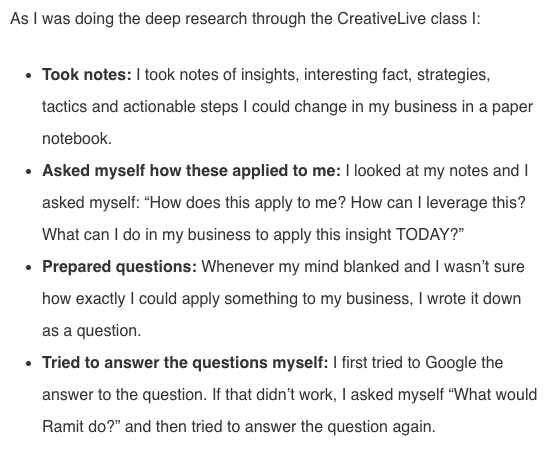
You don’t need to invest in fancy design to write a successful Ultimate Guide, but you should make sure your readers actually stay and read the guide.
When your readers spend 10 minutes reading your guide rather than 30 seconds, Google will know – and will push your guide to more readers.
Tip #3: Get your overview right
There’s two parts of the “overview” – your introduction and your Table of Contents.
I’ll be the first to admit that I often include a LOOOONG introduction to my Ultimate Guide to Attending Conferences.

Yeah, this is just a fraction of my introduction.
Steven pointed out to me that a long introduction can hurt you more than it can help you. When someone finds you through Google after searching for a solution to your problem, they don’t want to hear your whole life story. They just want to solve their problem.
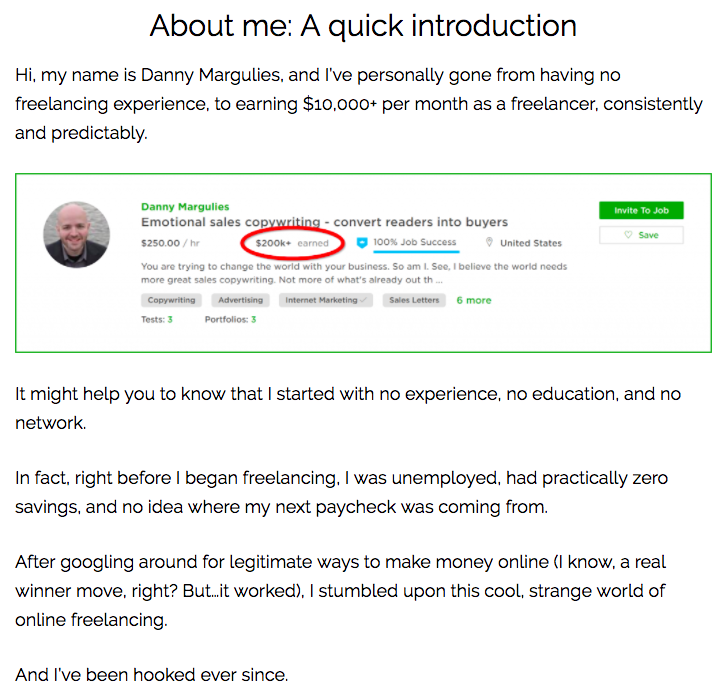
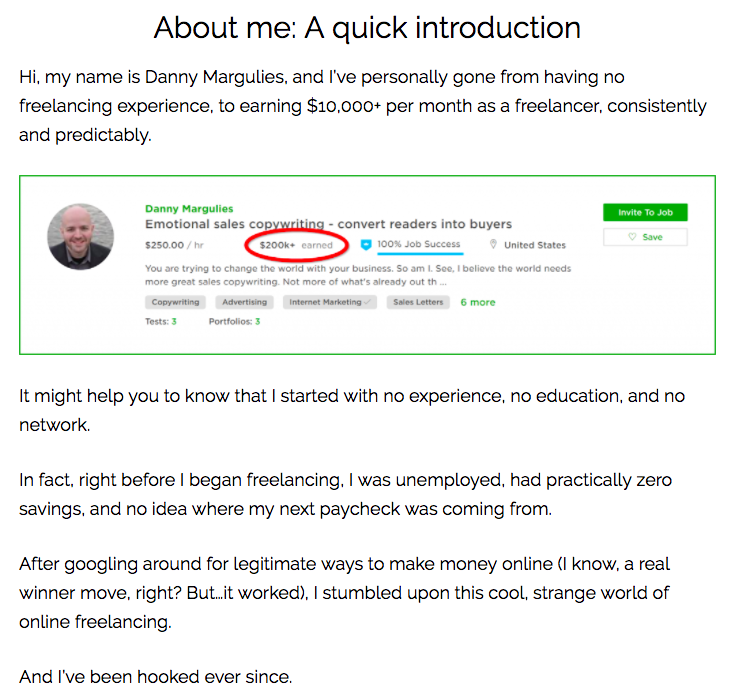
Instead of turning your introduction into a book, write a 1-3 paragraph introduction that gets to the point quickly, gives you the credibility you need and move on to your outline (example from The Ultimate Guide to Finding Your First (or Next) Freelance Job from Freelance to Win):
You can use Brian Dean’s APP method to give more structure to your overview:
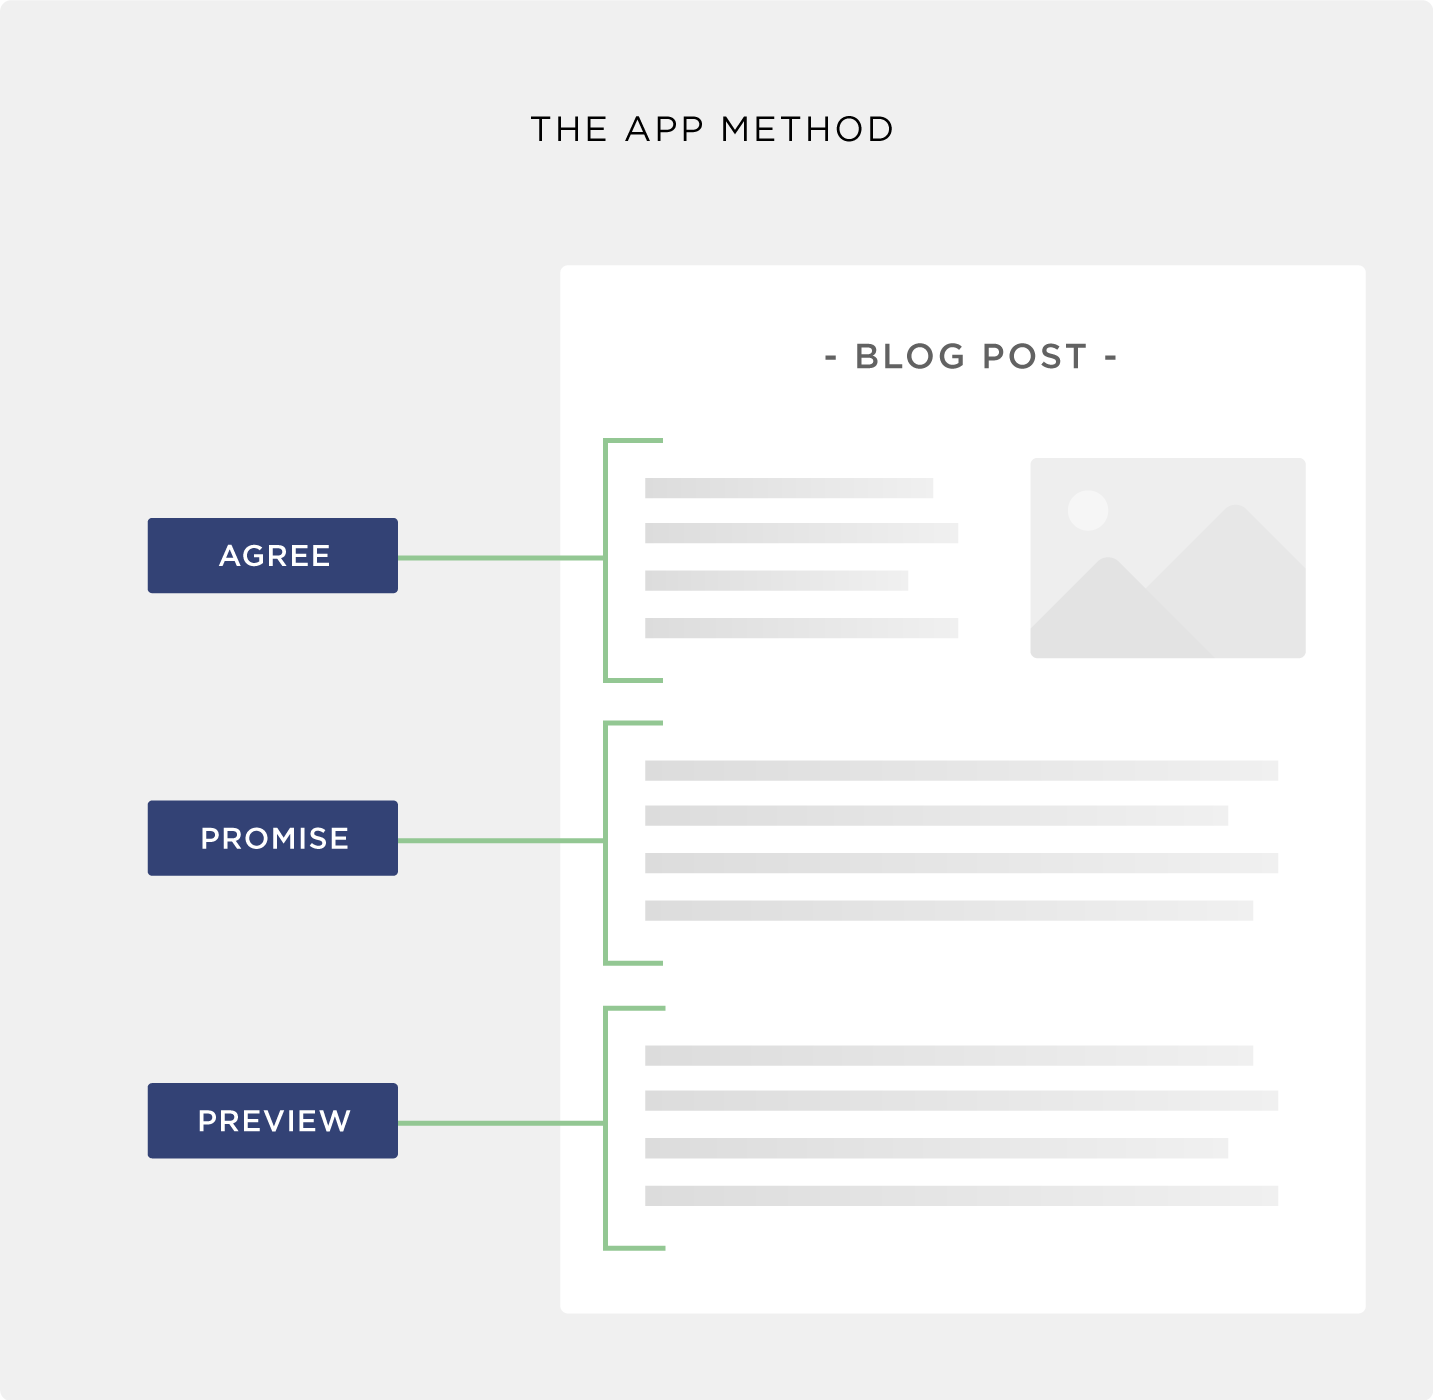
This way, you’ll be able to avoid going on a tangent and focus your guide on the problem you want to solve for your audience.
Make your Table of Contents SEO friendly
The same tips that apply to choosing the right SEO title (covered under Tip #1) also apply to choosing the right chapter titles and headlines in your Table of Contents.
If you split your Ultimate Guide into chapters (covered under Tip #4), each of your chapters will function as a separate blog post, which can rank on Google as well.
For example, after I played around with Google Autocomplete for a few minutes, I’ve found a gold-mine of ideas for chapter titles:
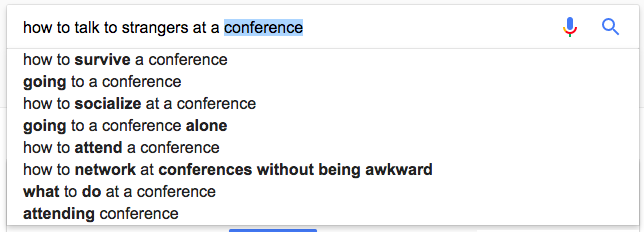
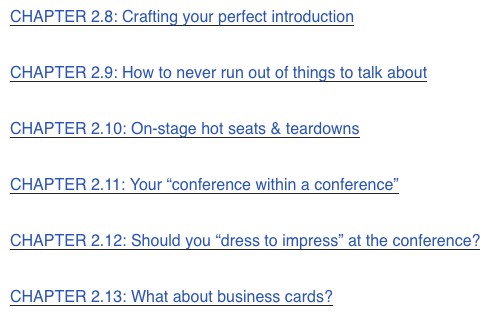
What surprised me was that people don’t really seem to Google things like “How to connect with speakers at a conference” and other things I included in my outline:
Why you SHOULDN’T make a 100% SEO-friendly Table of Contents
Things do get a little bit trickier here though.
You can still use the ideas from Google Autocomplete to write the SEO titles of your chapters, but there’s one other thing you’ll want to pay attention to – time per session.
Time per session is another metric that Google tracks, which means how much time someone has spent on your website (going through different pages). The more, the better. Facebook must rank really high because of that.
This means that when you’re creating your Table of Contents, you shouldn’t just pick chapter names that are SEO-friendly.
You should pick names that are interesting to your readers and make them want to read more than just one chapter (I call these copy titles).
Let’s say you want to write a chapter about 7 important tools for attending conferences.
- The SEO-title might be something like “7 best tips for attending conferences”. It’s probably not the best title and your audience might feel tricked if they come for tips but find tools.
- The copy title might be something like “7 must-have tools for attending conferences” which nobody would ever Google, but it will be interesting to readers who are already there.
Think of your SEO titles as the candy that brings readers in.
Your copy titles are salad dressing that make the things that your readers need to know sound more exciting.
My recommendation is to make sure your guide has a mix of both SEO titles and compelling titles.
The SEO titles will help you bring more readers through Google, and the copy titles will help you keep your new readers engaged.
If you want more help with creating a really killer Table of Contents for your guide, make sure you also read about my “BIG SIX outlining technique”. It will change the way you approach outlining forever.
Tip #4: Split your guide into chapters
Steven worked on an Ultimate Guide to Typography Guidelines for a client recently. It was about choosing the right font sizes for different systems (Apple devices, Android phones, etc.).
Originally the guide was all in one page, and his client was wondering why it doesn’t rank high for searches like “iOS font size guidelines”.
The problem was that his guide was around more general topic (typography guidelines, not exclusively about iOS guidelines). Because Google wants a result that is as specific as possible to what someone is looking for, his guide wasn’t ranking well for the specific search terms.
They split the guide into separate chapters:
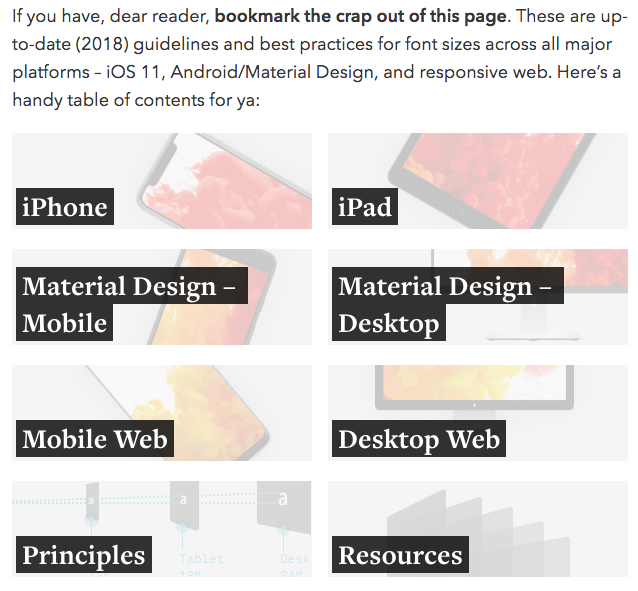
They created dedicated chapter names like:
- The iOS Font Size Guidelines (Updated for iOS 11)
- The Android/Material Design Font Size Guidelines
- The Responsive Website Font Size Guidelines
The chapter names were very related to what their audience was Googling. And quite soon, the separate chapters started ranking among the top results on Google.
For example, if you Google “iOS font size guidelines” now, you’ll see that the iOS chapter of the guide ranks as #3 on Google, and the whole Ultimate Guide ranks as #4 (right after articles from Apple on the topic):
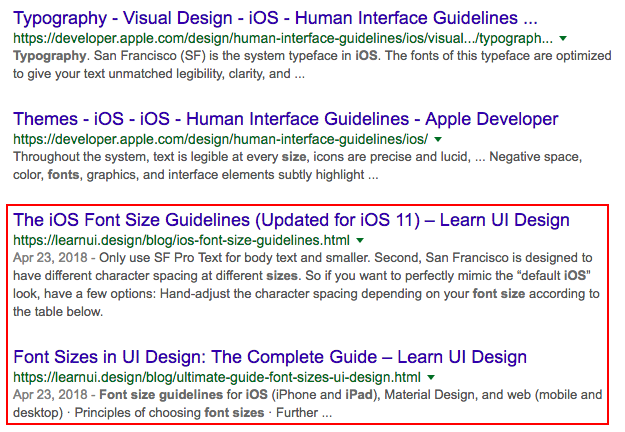
If you split your Ultimate Guide into chapters, there’s another great side-effect: You’ll be able to increase the “pages per session” metric. The more pages of your website your readers click to within a session, the higher it will rank on Google.
3 steps to splitting your Ultimate Guide into chapters
I’m guilty of not splitting my Ultimate Guides into chapters as I thought a one-page guide provides a better reading (and searching experience).
I still believe that, which is why I’ll continue to offer my Ultimate Guides as PDFs for my email subscribers. This will help them read the guide in one document if they want to, or print it out.
But now that I learned much more from Local Viking and my own practice, and understand how the SEO behind a guide works, I’ll make sure I split my longer guides into 2,000-3,000 word chapters and give them more potential to drive traffic through Google.
To split your guide into chapters, just follow the steps below!
Step #1: Create your HUB page
You should start by turning your existing Ultimate Guide page into a HUB that connects the guide to all the chapters.
Think of your HUB as a central train station that all the trains go to:
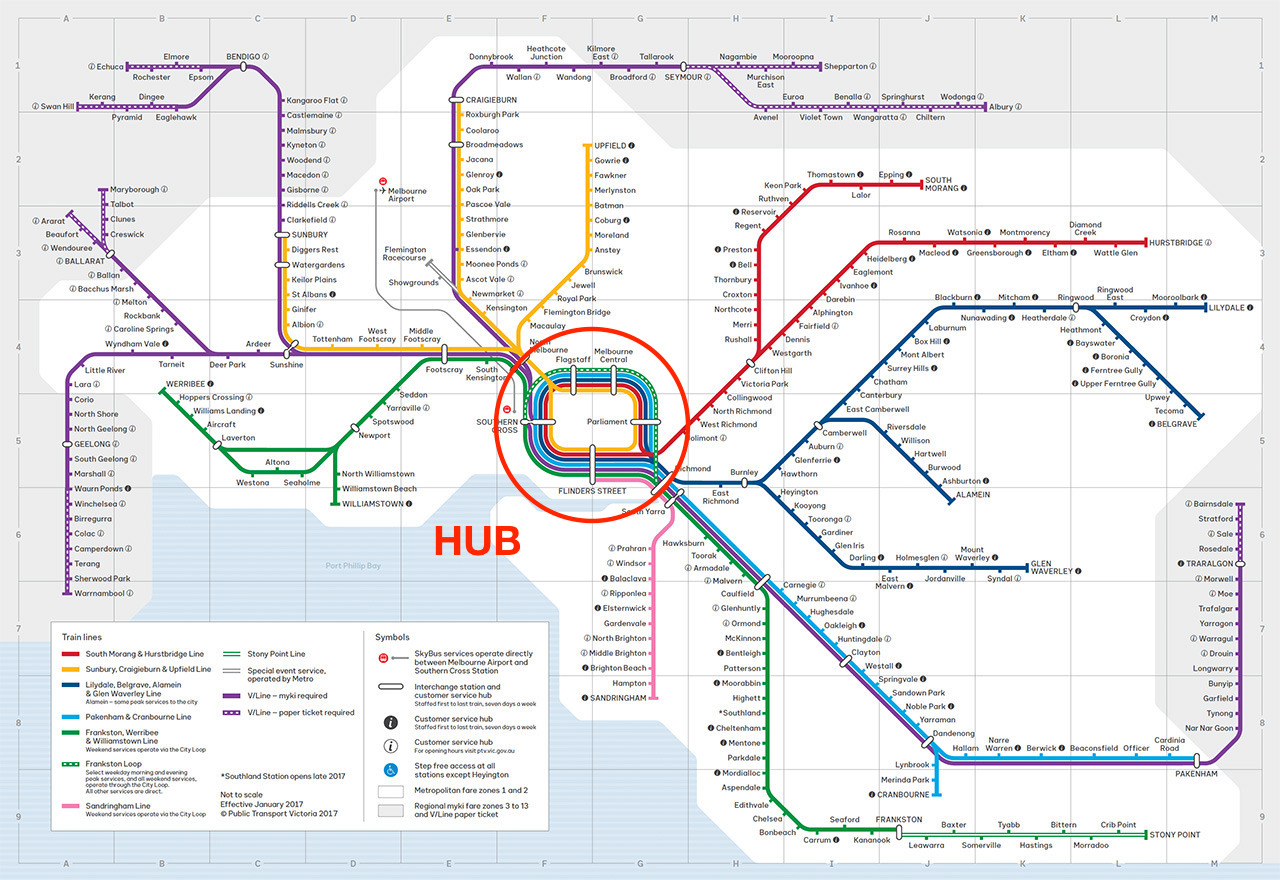
The HUB page should include:
- Hook: The introductory story or section that draws your readers in and assures them they’re in the right place
- Introduction: The 1-3 paragraph introduction that explains who you are, why you wrote this guide, who this guide is for, and establishes credibility.
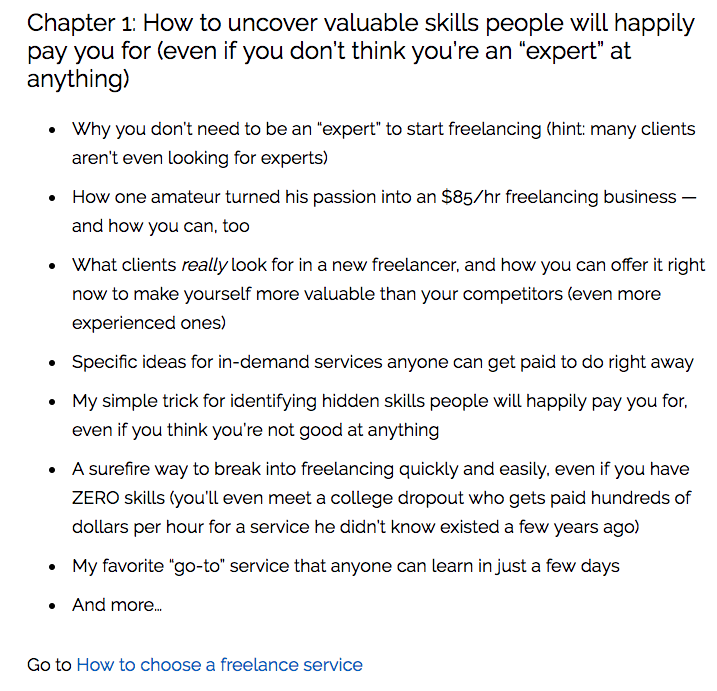
- Table of Contents: The links to all the chapters and short descriptions of what each chapter includes.
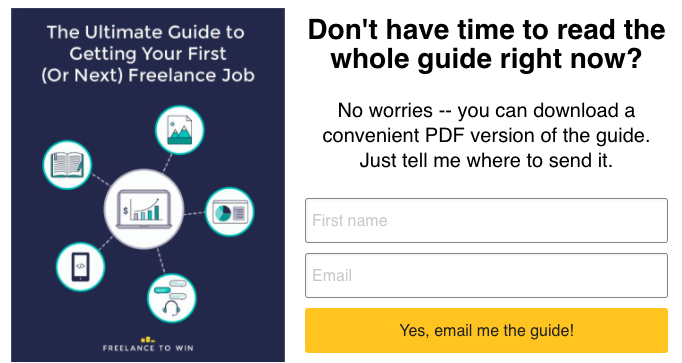
- Call to Action: The opportunity to subscribe to your e-mail list and get the PDF version of your whole Ultimate Guide as a gift.
Below is an example of a HUB page from The Ultimate Guide to Getting Your First (or Next) Freelance Job.
It includes a hook:
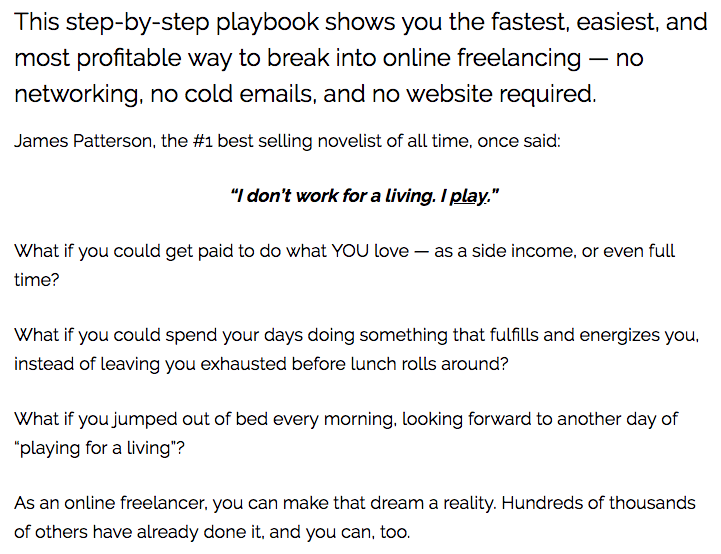
An introduction:
A Table of Contents:
And a call to action inside the opt-in box:
Here are a few additional examples of HUB pages I love:
- The Beginner’s Guide to Online Marketing from Neil Patel
- The Ultimate Guide to Forms and Surveys from Zapier
- The Ultimate Guide to Social Skills from Ramit Sethi
You can see that these examples all have a similar structure and include the key sections (hook, introduction, table of contents and call to action), but have drastically different designs.
Now that you’ve seen these examples, you can go ahead and create your own HUB page for your guide.
Step #2: Create your Chapter Pages
Once you’ve created your HUB page, you should create Chapter pages for each of your chapters (this can be as simple as copy pasting the old content into new pages).
As you do that, make sure you create new SEO titles for each of the pages so the pages can rank high on Google.
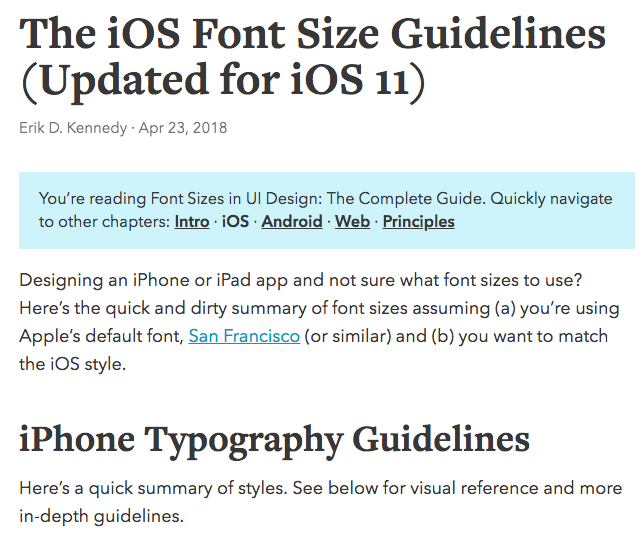
Each of the chapter pages should include the navigational boxes (explained below), the content of the chapter, a call to action and an opt-in box.
Here’s an example of a Chapter page from Font Sizes in UI Design: The Complete Guide:
As a call to action, you can use a specific comment request (we’ll talk more about comments below, under tip #5).
You should also always have an opt-in box at the bottom of the chapter that offers your readers the access to the PDF version of the guide and any bonuses that come with it:
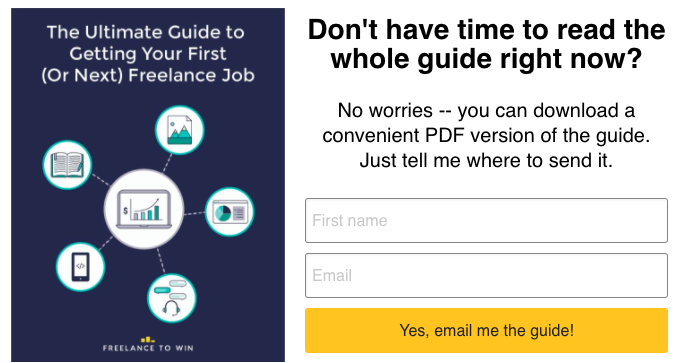
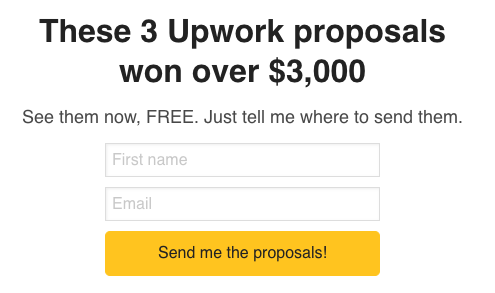
If you have the extra time, you can also develop specific bonuses for each of your chapters.
Like this Upwork proposals bonus that is at the end of the “How to write Upwork proposals that make clients say, “Take my money!” chapter of the above guide.
Step #3: Add the Navigational Boxes
You’ll also want to create navigational boxes that you will add on the top of each Chapter page.
Navigational boxes could look like this:

Or this:

To create a navigational box, create a content box and then include the link to the HUB page to it. You can also include links to other Chapter pages if the names are short enough (see second example).
This will help readers that find your guide through one of the chapters read the whole guide.
You’ll also want to add a link to the next chapter at the bottom of each chapter:

This way, your readers can easily jump from one chapter of the guide to another.
Extra credit: Create your navigational sidebar
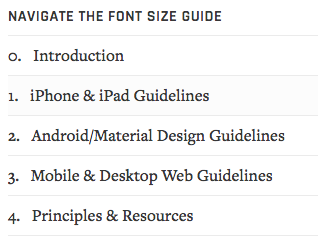
Finally, you could create a navigational sidebar like this:
Or this:
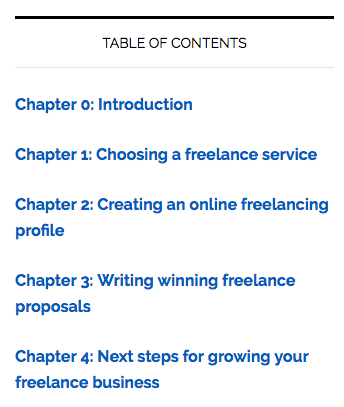
This might be a bit trickier and require some coding skills. First you’ll have to find a good sidebar plug-in that allows you to link to chapters of your guide (you can usually customize a popular posts plug-in).
Then you’ll have to create custom sidebars for the HUB page and Chapter pages of your guide.
If this seems like too much hassle right now, don’t sweat it. Stick with the navigational boxes for now, which should be more than enough to let your readers navigate through your guide.
Tip #5: Use chapter-specific Calls to Action to get more comments
Once you split your Ultimate Guide into multiple chapters, you should focus on optimizing each Chapter page to get as many comments as possible.
Comments are very important if you want your Ultimate Guide to rank high on Google, and publishing a 20,000+ word Ultimate Guide and asking people what their favorite part of it was isn’t the best way to get comments.
Instead, you can create calls to action that are specific to each chapter of your guide.
For example, if I wrote a chapter of an Ultimate Guide about connecting with speakers at conferences, I could ask my readers what their horror stories are from connecting with conferences speakers.
How to ask compelling questions
The best questions for getting more comments:
- Solicit an emotion from your readers
- Ask readers to share their own stories and experiences
- Help readers express their opinions
You can see some of those elements used in the example of conference horror stories above.
Everyone has a horror story like that – they’re usually filled with emotion, they’re interesting stories, and allow them to express their opinions.
One of my favorite blogs to read for studying comments is One Mile at a Time. It’s a travel blog that does a phenomenal job with soliciting comments and gets hundreds of comments a day.
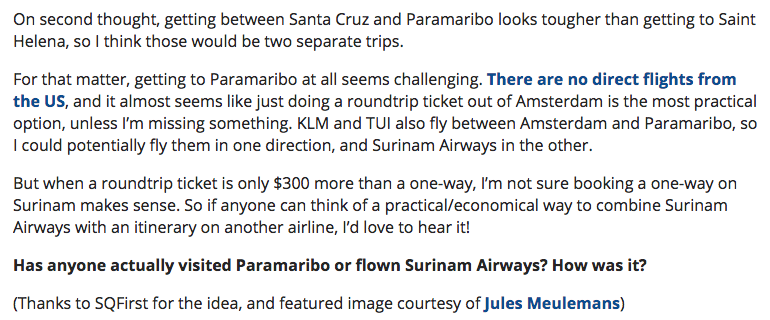
For example, in a post about Surinam Airways, they ask their readers about their experience with Surinam Airways.
In a post about a new start up airline, they ask their readers for their opinion if the airline will succeed:

In a controversial post about crediting miles from traveling with friends to your account, they ask them about the emotional situations (fighting over points, selfishness).
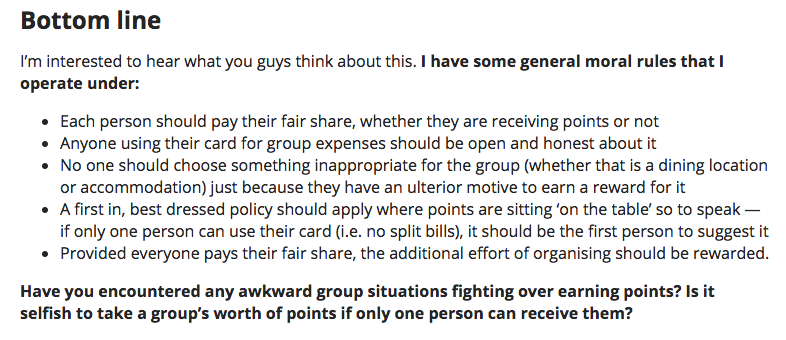
Pay attention to how they phrase their questions (“What do you think…”), and see if you can apply some of these examples to make your calls to action stronger!
6 ways to get more comments on your Ultimate Guide
To get more comments on your Ultimate Guide, you can use:
- Launch Emails: Ask for comments in the emails you send out when you launch your guide
- CTAs: Place specific calls to action at the end of each chapter
- PDF: In the PDF version of your guide, you can ask people to leave comments on your blog by linking to dedicated comment sections
- Social Media Posts: Ask people to comment on your blog in your social media posts
- Engagement: Respond to all the comments that you get on your blog to entice more of your readers to leave their comments
- Podcasts: If you talk about your Ultimate Guide during a podcast interview, you can ask the listeners to leave a comment on your guide
The more often you ask your readers to leave a comment and the more compelling your questions are, the more comment you’ll get on your guide, and the higher it will rank on Google.
Want more tips for creating killer Ultimate Guides?
These tips from our conversation with Steven are just the tip of the iceberg. There’s so much more gold that he shared, and we included the whole 90-minute interview in Ultimate Guide System.
But even if you don’t have access to Ultimate Guide System, you can start writing your first Ultimate Guide today.
You can download a free copy of The Ultimate Guide Checklist, my free 13,000-word e-book on writing Ultimate Guides.
You’ll learn:
- How writing my first Ultimate Guide helped me go from 0 to $38,000 in coaching revenue in an industry where nobody knew me yet.
- How I used Ultimate Guides to build an email list of 2,200+ email subscribers within my first year of starting my blog.
- How one of my Ultimate Guides lead to a $36,381 product launch and helped me establish myself as an expert in a new niche.
To download your free e-book, simply leave your name and email in the box below and I’ll send it your way!
-Primoz
Which of these SEO tips surprised you the most? Would a guide on how to do link building help in the future? And which SEO tip will you implement in your next (or existing) Ultimate Guide? Let me know in the comments below!
Learn how I attracted 337,838+ visitors to my blog

Download my free 13,000+ word Ultimate Guide Checklist and learn how I used Ultimate Guides to drive 337,838+ visitors to my blog!
Primoz, thank you so much for this awesome post! A lot of things I can implement, and below is a quick review of what I plan to do:
-I’ll get cracking on tip #1 for SEO since it’s pretty easy to implement but I haven’t put too much thought into SEO so far.
-I will look over tip #3, as I don’t have a clear-cut overview and I rambled a bit/lot on mine.
-I’ll make sure to review tip #5 with calls to action and comments.
-Finally, I’ll review tip #2 and tip #4 later, as you lessons from the Ultimate Guide System has me pretty well covered there 😉
Thanks again for the super useful post!
Love it Man! Send me your updated guide once it’s done :).
Hi Primoz,
This is good stuff man. The entire post is good but I’ll definitely be splitting my guide into chapters.
I don’t have access to tour Ultimate Guide system so I’m using the checklist which is very useful.
I had my first interview with an expert on my topic on Friday so I’m pretty buzzed to put a lot of these tips into action.
Cheers!
Love this, Primoz, especially the title recommendations, as those research methods are the same I use to find killer titles/ subtitles for my children’s books; the only difference being that I’m using Amazon’s search bar for the auto complete suggestions (instead of Google’s).
My favorite part was the suggestion to use SEO titles to help me bring more readers through Google, and compelling titles to help me keep new readers engaged.
I love how you continue to improve the Ultimate Guide System. This SEO addition is the cherry on top! I can’t wait to watch the full interview with Steven!
Love your takeaways Eevi!
HOTTTT DAAAAYUUUMMM DUDE!!!
this is blog post is frikken GOLD man! It’s like eating a ice cream sundae covered in whip cream, and chocolate syrup. It’s sooo good, you just don’t want it to end! 🙂
I’m DEFINITELY saving this post FO SHO! As you already know, I’m in the process of writing my guide and when it comes time to post on my site, these tips are gonna be sooo useful for me.
But right now, my #1 takeaway was when you said
1. “Instead of turning your introduction into a book, write a 1-3 paragraph introduction that gets to the point quickly, gives you the credibility you need and move on to your outline ” and
2. Use the APP method
Boom!!
That’s something that I can start implementing RIGHT NOW as I’m writing my guide.
Duude..thanks SOOO much for putting this together. This is sooo helpful brotha!